
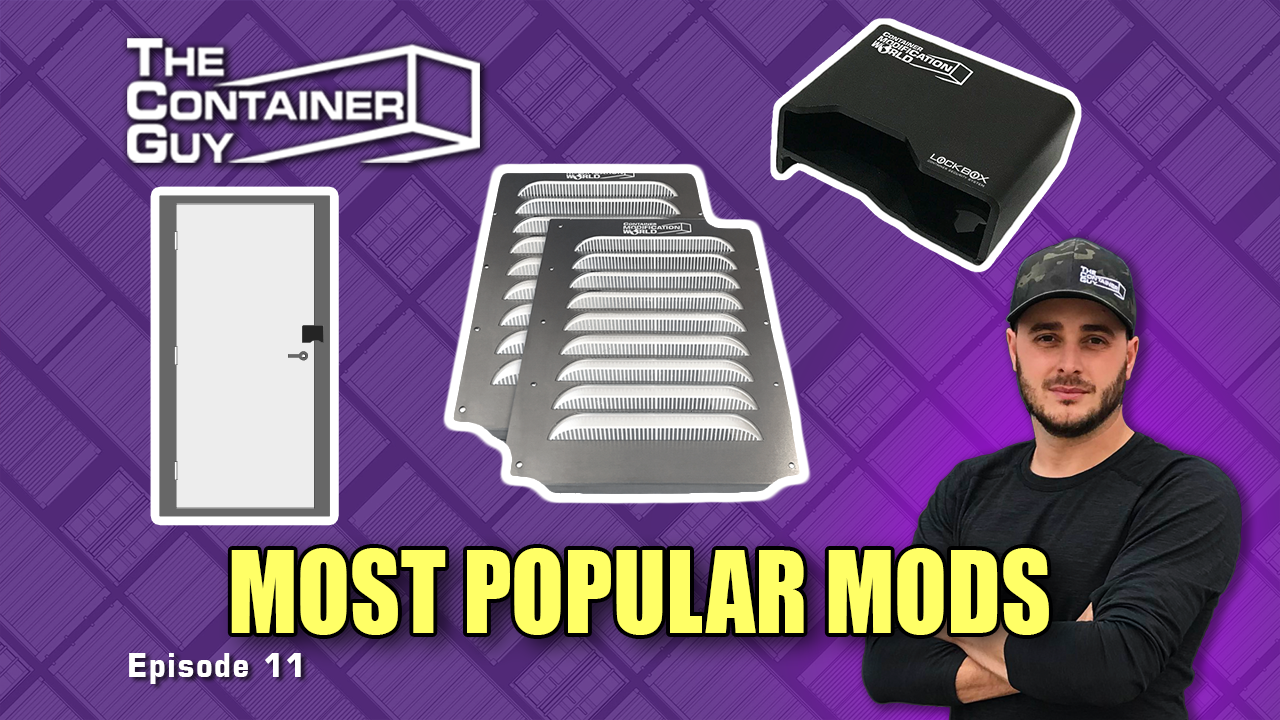
Today, we will be installing our three most common shipping container modifications. We will be installing a man door, two vents, and two lockboxes (includes shackle lock) on this sea can.
This customer used our 2D Planning Tool, planmycan.com, to design their 40’ shipping container modification. It is an easy program to use -- You can even use it to help design your container home, container coffee shop, or container cabin.
Purchase Container Modification World Products Used In This Video
YouTube Video Transcript
0:00
Hi I'm Channing McCorriston, the container
0:02
guy today we're going to be doing
0:04
probably our most common set of
0:06
modifications to a shipping container
0:08
this used 40 foot is getting a man door
0:11
two vents a lock box and a shackle lock
0:14
stick around hope you learned something
0:16
after landing a deal on national
0:18
television in 2011 where his team
0:20
pitched their idea of modifying shipping
0:22
containers he went on to start his own
0:24
business since then he's completed
0:27
thousands of container modifications for
0:29
clients in every major industry
0:32
now he wants to teach you everything he
0:34
knows about container modifications and
0:36
accessories
0:38
channing mccorrison is the container guy
0:46
before we get started make sure you
0:47
subscribe to our channel to follow us
0:49
along day by day as we modify containers
0:51
and install accessories now i'd like to
0:53
show you just how easy it is to use our
0:56
2d planning tool at planmycan.com
0:59
for this customer modification they have
1:01
chosen a 40-foot high cube container in
1:05
used condition
1:07
to start they'd like additional access
1:09
at the back of the container and so
1:11
they've selected a man door
1:13
with a lock box on it and they want the
1:15
left hand out swing door so we'll click
1:17
on that
1:18
it drops it onto the left side wall
1:20
which is exactly where it's going
1:23
and
1:24
three corrugations over so you just
1:26
click and drag to drag it over you'll
1:28
also notice here that there is an x
1:31
button which will remove that if that's
1:33
the wrong component and the swap button
1:35
which will actually switch it to another
1:39
side of the container so now that we
1:41
have our mount door where we want it
1:42
we'll jump over
1:44
like two passive uh big air 45 vents the
1:48
first one we'll draw
1:50
this is going to go at the front end of
1:52
the container near the doors on the left
1:54
hand side
1:56
and then one more vent
2:00
that will be swapped down to the right
2:03
hand side of the container
2:06
at the far back end and so you can line
2:08
these up vertically so that you have the
2:10
same distance from the end wall as the
2:12
container doors and then lastly
2:15
because we have added security on that
2:16
man door
2:17
let's get
2:19
a lock box on the container doors
2:21
we will also add
2:23
the
2:24
shackle lock
2:26
to make sure that that's included and
2:28
then we'll want
2:29
two of those because there's a lock box
2:31
on the doors and
2:33
on the mandatory and the lock box on the
2:34
container doors lastly you'll notice
2:36
here on the far right side there is the
2:39
estimate builder this
2:41
keeps a running tally
2:43
of all the modifications not the actual
2:45
container cost itself so it shows you
2:47
the added cost
2:49
to perform this modification over and
2:51
above the cost of the container if you
2:53
request a quote from our sales staff
2:55
we'll get back to you with a final
2:56
estimate delivered to your location in a
2:59
timely manner now
3:01
let's get back to actually modifying
3:03
this shipping container this container
3:05
is getting the mandarin installed at the
3:06
back end of the can so we're not going
3:08
to go into too much detail on the
3:09
install we'll show you a few clips of it
3:11
getting done but you can check out our
3:13
library and we do have a full length
3:15
video on a step-by-step instruction how
3:18
to install these mount doors
3:24
[Music]
3:33
so here riley's just marking out the top
3:35
vent near the door end we have our fancy
3:38
marking tool because we install so many
3:39
of these container modification worlds
3:41
big air 45 vents we love them big thing
3:44
people sometimes think they only need
3:46
one no you need two of them one always
3:48
acts as an intake and exhaust and it's
3:50
great for passive ventilation so totally
3:52
keep your heat down and reduce the risk
3:54
of condensation riley's got the vent
3:56
hole cut out and he's got the big air 45
3:59
vent here
4:01
yeah so basically it's pretty simple you
4:03
just drill your 10 holes rivet in place
4:06
and then just silicone along the top and
4:08
bottom edges on this container we're
4:10
going to be installing a container
4:12
modification world lock box these are
4:14
great for adding your lock
4:16
super well packaged they come with a
4:18
nice warning sticker on them so 24-hour
4:21
security system that'll keep the
4:22
burglars away they'll be scared some
4:24
noise is going to be coming off if they
4:26
try breaking into your console
4:28
[Music]
4:34
this lock box here can either be
4:35
installed up above
4:37
uh i don't know what that is the stopper
4:39
plate there or below depending it's a
4:42
little bit harder to to see what you're
4:44
doing under here but maybe harder for
4:46
a burglar to get up in there and less
4:49
room to work but
4:50
it's nice to kind of be just above it
4:51
make sure you're far enough down so that
4:53
this doesn't collide with your lock and
4:55
what's really cool is uh the lock box
4:57
here it's laser cut to the exact profile
5:00
of the door seal it's also folded to the
5:03
profile of the door seal
5:05
so and this side is a little bit deeper
5:07
than the other so once that's installed
5:10
uh
5:11
it sits flush against both the left and
5:14
right door
5:15
and then the receiver just slides right
5:17
into the back here and it's accessed
5:21
with the lock up from the inside another
5:24
thing while i'm out here i see riley has
5:26
marked out the lock box holes but he
5:29
hasn't drilled them yet so this is a
5:30
good time to show you the logic behind
5:32
that
5:33
so here
5:34
uh yeah basically you start with your
5:36
large washer mark your holes and then
5:38
mark the bottom
5:39
of of it and then
5:42
he actually you just transfer this
5:44
across
5:45
and so level across you make a mark and
5:47
that'll be the bottom of your small
5:49
washer plate
5:51
and so it again just tucks up nicely
5:53
against the uh the door seal
5:56
and then you mark those two holes and
5:58
you'll know
5:59
those holes will be exactly
6:01
where our 3d modeling wants them
6:06
[Music]
6:17
and so here's that 80 millimeter shackle
6:19
lock
6:20
so it's got yeah the slide shackle
6:23
uh it works
6:25
this lock box is designed around this
6:28
lock so it works perfectly
6:30
there you have it
6:32
so now that we have the container doors
6:35
all bolted up rock solid with the uh the
6:37
lock box on them uh the easiest point of
6:40
entry into this container is through the
6:42
mandor now so even though it has the
6:44
astragal here that protects you know
6:47
crowbars or anything from getting in and
6:48
trying to pop open the latch on the door
6:51
lever
6:52
uh it's still yeah the weakest point you
6:54
know someone could just sledgehammer the
6:56
door lever right off so one thing we
6:58
suggest if you're going through the
7:00
hassle or the expense of installing the
7:01
lock box on the container doors get the
7:03
lock box on the manuals as well so
7:05
this is a left hand lock box this is the
7:08
the reverse of the regular lock box that
7:11
goes on the container door so
7:12
uh these lock boxes are left and right
7:15
hand versions so if you're doing a left
7:17
hand out swing or a right hand out swing
7:18
door
7:19
there's always a lock box option for you
7:21
and and the same
7:23
laser profile that clears the container
7:26
rubber door seal also uh
7:30
clears the straggle on the on the mat
7:32
door
7:33
so i'll just quickly mark out this lock
7:35
box to show you where it should go uh
7:37
there is some thickness here so we kind
7:39
of want to get the bolts as far over
7:41
that way as we can on the lockbox
7:42
portion of it so i kind of start with
7:44
the you know opposite of the container
7:46
doors i start the left side i leave it
7:48
about an eighth of an inch away from
7:50
this straggle
7:51
and then yeah if you mark your holes
7:55
and a line across the bottom i'll just
7:58
do a small notch because you might see
8:00
that
8:02
then we'd want to come
8:04
across
8:05
level-ish
8:08
so we got this washer plate
8:11
we'd come
8:13
one of these over
8:15
to match the door seal
8:18
and then we'd so now we have our side
8:21
referenced and our bottom referenced
8:23
make sure nice and
8:25
plum
8:26
and eyeball it here
8:28
and then mark your
8:30
your two holes for your larger lock box
8:32
so those if you measure the back of the
8:34
lock box should be awfully close to
8:36
where you need them
8:39
[Music]
8:42
so we have the holes all drilled out one
8:44
thing to note is typically on container
8:46
cargo doors the right door is often more
8:49
recessed than the left and so with this
8:52
lock box the right side of it is further
8:55
assessed inwards as well so in order to
8:57
make up for the man door actually being
8:59
bolts on the same plane what we can do
9:00
is take this spacer plate and actually
9:03
put it on this side of the lock box
9:05
and then
9:07
push your bolts through
9:09
and now this lock box is touching nicely
9:12
against the the frame and the door
9:14
itself
9:16
[Music]
9:22
uh final thing we like to do on all of
9:24
our used containers that we send out a
9:26
bit of a quality control thing is just
9:29
we have all of the shipping line
9:31
and leasing company paint codes paint
9:34
mashed and here in stock and we just
9:36
like to send someone out to touch up the
9:39
corner post and then any outside
9:41
corrugations that might have uh some
9:43
rust showing the surface rust just from
9:46
when the two containers rub against each
9:47
other on the ship so cleaning up the
9:49
corner posts and the top tubes and some
9:51
of the outside corrugations really
9:53
improves the aesthetics of a container
9:55
and keeps your neighbors happy
9:59
so we'll do a final flyover to recap the
10:02
mods on this cam at the back end to
10:04
improve access we've installed the dual
10:06
swinger man door with the left hand lock
10:07
box on the same side towards the
10:10
container doors we have a big air 45
10:11
vent installed up high then on the
10:14
container doors themselves the regular
10:15
container modification world lock box
10:18
installed we've also included 280
10:20
millimeter keto like shackle locks and
10:22
lastly we have another big air 45 vent
10:24
installed at the back of the can on the
10:26
opposite side wall to give good
10:28
cross-flow passive ventilation so that
10:30
wraps up this video as always if you
10:32
enjoyed it please give it a like
10:34
subscribe to our channel and hit the
10:36
notification bell so you're informed
10:37
every time we post a new video or check
10:40
us out at tcg.ca
10:42
hope you learned something!