
How To Install Vents In A Shipping Container - Big Air 45 Vent Installation
In this video, we will show you the proper way to install vents in a shipping container. We will teach you where to place the BigAir45 vents and how many you need to insert depending on the size of your sea can.
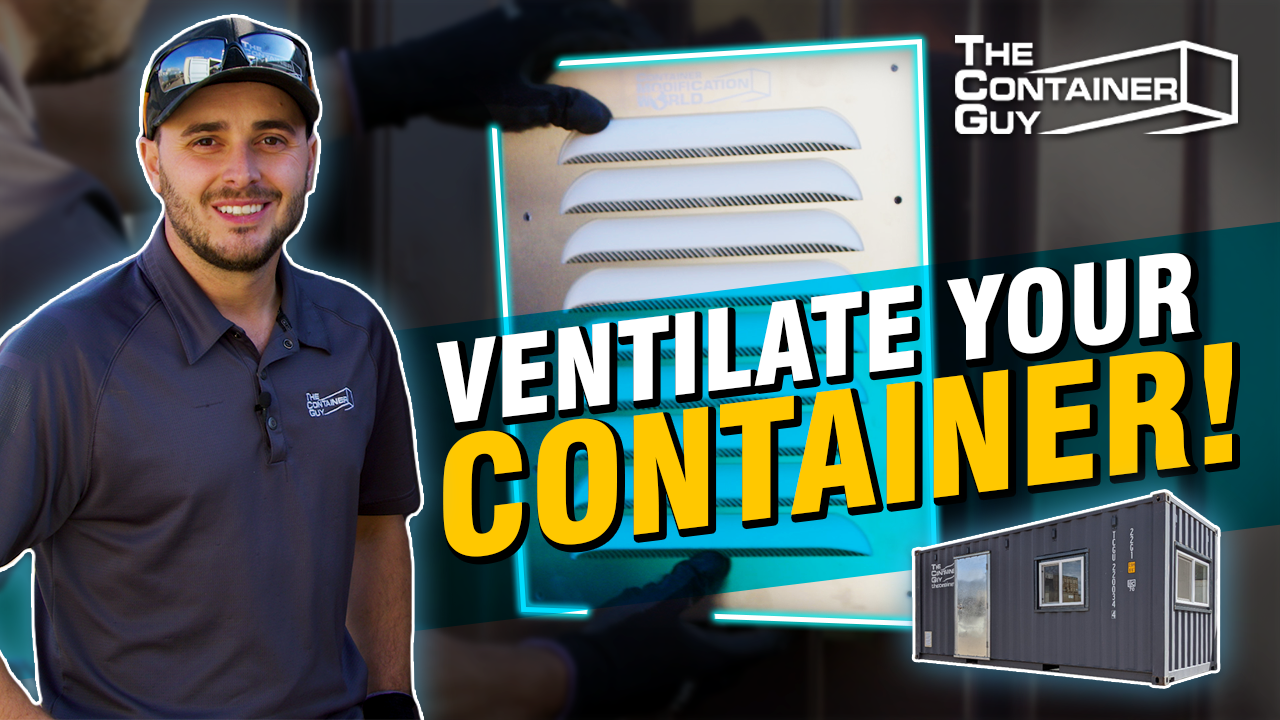
We will show you how to mark and cut the container walls and the best way to install them so your sea can is secure.
List of Tools Required:
Marking Pen
Tape Measuring
Tape Angle grinder & cutting wheel
Drill
Minimum 3/16 drill bit
Rivet Gun (for rivets) OR
3/8" Nut Driver (for self-tapping screws)
Caulking Gun
Silicone
What comes with this product:
2 Vents Paper Template (9” x 14”)
11 Self-Tapping Screws
11 Rivets Installation Guide
Benefits of using this vent:
Install them anywhere on shipping container (sidewalls, end wall, doors).
Eliminates moisture and excess heat
Will never rust
Computer model design
Note: They are corrugation dependant and must be installed on the outside corrugations. Please reference your corrugations with the corrugation dimensions outlined in this video to ensure this vent will fit on your container.
Purchase Container Modification World Products Featured in The Video
YouTube Video Transcript
0:00
is your container raining inside are you
0:02
struggling with condensation
0:04
is there excess heat in your container
0:05
to the point where you're melting
0:07
candles by simply installing two to four
0:09
big air 45 vents you'll resolve 90 of
0:12
these issues follow along
0:17
[Music]
0:21
hi i'm channing mccorriston, the container
0:23
guy in this video i'll be providing
0:25
installation instructions on the big air
0:27
45 vent on both the end wall and
0:29
sidewall of shipping containers i'll
0:32
also show you the big air 45 vent
0:34
without bug screen and one with the bug
0:36
screen for a list of the tools required
0:39
check the description below this video
0:41
before i get started make sure you
0:42
subscribe to our channel and ring that
0:44
notification bell to follow us along day
0:46
by day as we modify containers and
0:48
install accessories
0:53
a lot of people seem to be concerned
0:54
about the plastic in this vent design
0:56
but can place have been manufacturing
0:58
vents for the residential market in
0:59
canada for over 50 years their
1:01
proprietary polypropylene doesn't break
1:04
down from long exposure to uv light or
1:06
cold temperatures durflow's even pitched
1:08
baseballs at their vents to prove how
1:10
much stronger their plastic vents are
1:12
than aluminum the first step to
1:14
installing these vents is actually
1:15
figuring out where on your shipping
1:16
container you want to install them so we
1:19
recommend if you're only using two
1:20
bigger 45 vents to put one high and one
1:23
low on opposite corners of the container
1:25
included with your vents will be a paper
1:28
template which has the rough opening
1:30
that is nine inches wide and 14 inches
1:34
tall you can tape your paper template to
1:37
the container once you have that in
1:39
place make sure you hold up your vent
1:41
and ensure that the vent will fit nicely
1:44
in the hole that you have laid out and
1:48
the key number one most important thing
1:50
here is that you're doing this on
1:52
outside corrugations so you want to make
1:55
sure that you leave yourself with
1:56
something to secure the outside flange
2:00
of the big air 45 vent to so if you
2:02
installed it one corrugation over or you
2:04
had inside corrugations on both sides
2:06
this would not work now you got to get
2:08
out the welder and fix your hole so grab
2:10
your felt tip marker and follow along
2:13
the marking template that's now stuck to
2:15
your container make sure you at least
2:16
mark the outside corrugations and then
2:18
once you remove the marking template you
2:20
can finish marking the inside
2:21
corrugations afterwards
2:43
once you've got your vent in place nice
2:44
and snug in there now just grab your
2:46
drill drill through all the cut holes
2:49
and then just follow along again once
2:51
more with the rivets
2:55
final step is a nice bead of silicone
2:57
along the top and the bottom
2:59
and that'll keep water from intruding in
3:01
also if water is ever to get into the
3:04
gable vent here there are two drain
3:06
holes on the inside corrugation section
3:09
of this vent and that will allow the
3:10
water to drain and drip out of this vent
3:12
so don't be worried about no water
3:14
coming in and around if it does get in
3:16
it'll get out so given the way that air
3:18
moves in these containers the lower one
3:20
will typically act as the intake so for
3:23
this we are going to be installing it on
3:25
the sidewall corrugation so you see the
3:27
different corrugation profile on the
3:28
sidewalls big thing to note here is you
3:31
need to choose the outside corrugations
3:33
on both sides again if you installed it
3:36
over here and had nothing to install it
3:38
this vent would not work so the outside
3:41
flanges require the outside corrugations
3:44
to rivet or self-tapping screw into and
3:47
then for this one just for demonstration
3:48
purposes we're going to be installing
3:50
the big air 45 vent with the bug screen
3:52
so you see the difference here
3:54
some people especially in the lower
3:56
united states are concerned about little
3:58
critters crawling through that tiny
4:00
little gap there i don't really see it
4:02
happening but to solve that problem
4:04
there is this uh bug screen which is the
4:06
same mesh material that's on your screen
4:08
door of your home so this here will get
4:10
her installed and show you how this
4:11
works as well
4:14
[Music]
4:24
[Music]
4:30
if you're fussy you can even jump inside
4:32
and silicone along the top edge down the
4:34
sides and even your rivets in case the
4:36
center punches out
4:38
there is the cheapest insurance money
4:39
can buy to protect your valuables from
4:41
the elements if you're looking to keep
4:43
your items secure from vandals check out
4:46
container modification world's high
4:48
security lock box so that right there is
4:50
the proper way to install a big air 45
4:53
bend if you found this video helpful
4:55
please hit the like button subscribe and
4:57
ring that notification bell
4:59
if you have any new product suggestions
5:01
or comments please feel free to leave
5:03
them down below and as always check us
5:05
out at tcg.ca
5:07
hope you learned something!
5:09
[Music]
How To Install Vents In A Shipping Container - Big Air 45 Vent Installation
Tags: Ventilate