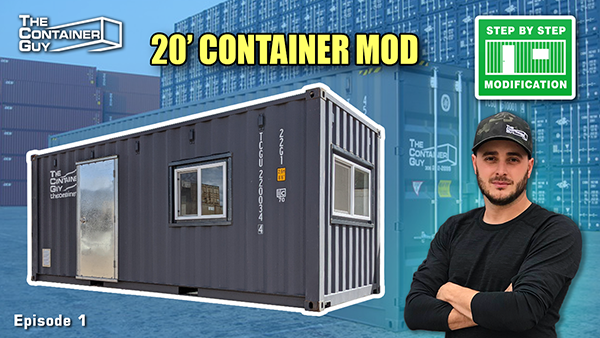
Step by Step 20’ Shipping Container Modification | Windows, Vents, Man Door, Insulation, Electrical
This Shipping Container Modification Step by Step instructional video explains the process of installing a door, windows, vents, strut channel framing, spray foam insulation, and single circular electrical into a 20ft, one time use (like new) shipping container. This modified 20 foot container is for a honey bee farmer, and we will take you along as we convert it into a Honey Processing Room.
Do you want to start planning your modified shipping container? Go to https://www.planmycan.com/ to get started.
Products installed:
CSM Brackets
Big Air 45 Gable Vents
Sidewall Window Frames
End Wall Window Frames
For any inquiries on our man door, please contact us at:
sales@containermodificationworld.com
Check out The Container Guy website at www.tcg.ca
YouTube Video Transcript
0:00
Hi, I'm Channing McCorriston, The Container Guy. Today we're prepping this 20-foot one-time-use shipping container for a customer modification. The customer was able to use our online planning
0:10
tool, planmycan.com to place the windows and doors exactly where they wanted them.
0:17
After landing a deal on national television in 2011 where his team pitched their idea
0:22
of modifying shipping containers, he went on to start his own business. Since then,
0:27
he's completed thousands of container modifications for clients in every major industry.
0:33
Now he wants to teach you everything he knows about container modifications and accessories.
0:39
Channing McCorriston is The Container Guy.
0:49
In this container, we'll be installing a man door, a sidewall window, another sidewall window,
0:56
and an end wall window. We'll also be lining the interior with strut channel,
1:00
and installing our container door flashing kit and wall flashing kit.
1:08
One thing to note about our modular window and door frame kits is that they're corrugation
1:13
dependent. They require outside corrugations on either side to be secured to the container.
1:20
This allows the customer to move the window or door every 11 inches or 278 millimeters.
1:26
We've already marked out the rough openings in this container, so the next step is to
1:30
cut them out. Quick tip is to use a corded angle grinder with a six inch cutting wheel.
1:34
We've tried everything from plasma cutters, torches none of it seems to work. We always
1:38
seem to resort back to just a nice clean edge that a six inch cutting will give us.
1:43
Make sure you refer to the rough opening dimensions provided to you with
1:47
your window or door kit. It's extremely important, and I'll say it again, that
1:51
your hole is marked out centered between two outside corrugations.
1:55
One thing that's interesting about shipping containers is that the side wall corrugations
1:59
are different than the end wall. So a window that works well on the sides like a 36 or 48
2:04
inch wide window is not so good on the end wall where we use a 40 inch or a 60 inch window.
2:10
For this customer, they've chosen the larger of the two,
2:13
so we're using a 60 inch by 30 inch tall end wall window.
2:17
Cutting out man doors or roll up door frames, you'll run into d-rings.
2:22
And so when you're going through and cutting with your six-inch cut-off wheel.
2:26
you just sink it and go through as much as you can, and then once you drop the panel,
2:31
you'll be able to come in here and clean up the rest and get that out of the way.
2:36
So we'll let the staff get at it, cut out these openings and we'll check in on them later.
2:48
Okay, so we're back here now. We can see the guys have cut out uh all of our openings. If you come
2:54
take a look here, you can see the nice clean job that the angle grinder and six inch cutting wheel
3:00
has done. It does leave a few burrs that need to be cleaned up, but all in all allows for a nice
3:06
easy caulk job afterwards, or we also use a top bulb seal up in the top corrugation. That rests
3:15
against the header of our man doors, windows, and roll-up door kits and provides a nice clean seal.
3:21
Here's our top bulb seal that I was talking about. This, it has little edges there that grab
3:29
and hold the corrugations, and it's very flexible so it allows you to - to round the corners on
3:35
sidewall and end wall corrugations, and then the bulb itself squeezes.
3:40
You want to get about a 40 or 50 percent compression, and that allows for the best seal
3:45
on the header so. Just when you're spacing your rough opening, make sure to account for
3:50
the extra opening distance. So yeah, it just snaps right in, it's easy, just follows along with you.
3:58
Really nice, clean edge that it leaves you.
4:01
Guys can actually do it along the side. There's some that doesn't have the bulb on it, or there's
4:06
some that has the bulb on the side rather than the top. Take your knife, cut - you gotta cut
4:12
in between - there's some metal supports in there that are kind of tricky to find.
4:19
Clean that edge up.
4:23
Here's our uh our window frame kit. It's really nice because this - this
4:27
top flange actually gets up and holds the the window in place once you lift it up there.
4:32
What used to be a two to three man job, typically you can do by yourself.
4:42
Yeah, perfect. Up at the top, see where that bulb seal is resting nicely on the header,
4:48
up and over. Yeah, that's a nice finished seal. Water doesn't get in there.
4:54
All we have to do now is just silicone along the sides, and uh on the inside we can actually
5:00
get the bottom edge there, but this can is actually getting spray foamed as well so.
5:06
In addition to all this, the spray foam will definitely seal it up.
5:08
Yeah, the windows uh they're already pre-laser cut holes here, so all we have to do is just uh
5:13
drill the holes, and then rivet it in.
5:22
Simple as that.
5:22
The guys put the other two windows in this container.
5:25
Uh, we'll get a close-up of this and just show you what they've done.
5:29
We've riveted it from the outside, and now we've siliconed all the rivets.
5:35
We've also siliconed the rest of the window frame, just make sure that no water
5:41
could ever get in. That's a bit of an overkill just because we're spray foaming this can,
5:45
but we wanted to show you guys how to do a proper job of it.
5:48
Here's the uh the man door, the cutout down along the floor, and you see here where the
5:53
the d-ring's been cut out so. Coming at it from this side, you typically can get right through
5:58
it if you have a new disc. Uh, one thing to note here is, I'd like to see more of the weld left.
6:04
The boys grounded down too low. So our threshold plates actually sit on that and allow -- uh that,
6:11
that allows you know some durability just because we have it returned folded downwards.
6:16
So, if that weld would have been left there a bit more, this threshold plate might not
6:20
felt quite as spongy when you're stepping on it but. We have a solution for that.
6:29
So yeah, then we'll just rivet it in through the holes and install the hardware and away we go.
6:35
Again, same as the windows, the door just installs the rivets.
6:48
So here we have our uh our container door flashing kit. After we spray foam insulate,
6:53
we can remove the side flashing, slide in a piece of plywood or drywall,
6:58
and then reinsert that flashing, and now you have a nice clean finished edge.
7:02
So this is the footer or header piece. It installs down,
7:07
either at the bottom or top. There's just uh self-tapping screws that go into these
7:12
hollow wreck tubes down at the bottom. And then yeah the same goes up top here.
7:18
Yeah that installs right up there so. That'll allow you to self tap it up into place there.
7:24
Once your headers and your footers are on, then you can install your side pieces.
7:28
So when you're going to install the container door flashing, the the footer and header,
7:32
you can use either uh rivets or self-tapping screws because you are going through this uh
7:38
hollow wreck tube in the door so you're not penetrating through the container.
7:41
I'll throw this one in here.
7:45
That's in place, then just finish her up all the way around, and we'll get to the side pieces.
7:50
Here's the the side flashing pieces for our container door flashing kit. These,
7:56
yeah just set right in place here. You'll be able to uh rivet them together in the four corners.
8:02
And then along the side here, it's pre-laser cut with holes. And it's best to drill and
8:08
rivet those just because the clearance is with the doors, but uh it does clear self tappers as well.
8:12
So here's the rest of the container door flashing kit.
8:16
The guys got it all installed. It's all riveted along the side.
8:23
And we also have this container wall flashing kit. This, again, retains the spray foam and give you
8:30
a nice clean finished edge if you're to steel stud and plywood or drywall line the interior.
8:36
It's also up here top edge, and so, again, we can seal stud across and you can tuck your
8:42
plywood or drywall right on top of that. It's adjustable with the slotted holes.
8:50
In this container, rather than a steel stud frame, we're actually gonna be installing our uh
8:55
our CSM brackets. So these allow us to install strut channel on the inside corrugations.
9:03
And then right now, I'm just gonna be marking out the container, just uh try to figure out
9:08
where it's best to put the strut channel because we have so many windows and doors so.
9:11
We got one here. Uh, I think we want to do kind of every second corrugation,
9:15
so we'll do another there. And then here, and now we're at our man door. So,
9:19
I've already marked uh this side. I've got all the X's in place where the CSM brackets are going,
9:26
and then I'll jump over the other side and explain why and where I put them.
9:29
This is where the door switch is going to be. We need a strap that goes into the light fixture.
9:37
This one here will catch the light fixture. Also gets the other side of the light fixture.
9:44
And we have a strap in between uh grab the conduit, and this one hits
9:49
the light fixture. Four over was the other one for light fixture, so that goes across.
9:54
And then here we'll actually put one to come down but not across.
9:59
So the reason why I'm coming down with the strut channel and not going across, we don't need it
10:04
to strap the light fixture. But as we come down, we have every second corrugation lined with strut
10:10
channel, we can bolt shelving brackets, fold down workbenches, pipe racks. It's basically
10:17
modular interior so, anything up and down and you can fabricate whatever you want bolted in with
10:23
quarter inch three eighths half inch spring nuts. It's great system, it's like Lego for big kids.
10:28
I'll try to hold this up here and demonstrate what that non-insulated
10:32
position would look like. So, if the strut was installed flush against the back wall,
10:39
this would allow you to use a bolt and spring nut and hold the strut. So now there's there's
10:44
no clearance behind the strut and against the container corrugation, and it's a nice sleek
10:50
finish where it doesn't really make the interior any wider, so gives you your full interior width.
10:57
I'm just going to take one of these apart just to show you the spring nuts -- a lot
11:00
of people haven't really used them before. Just, yeah, a regular bolt,
11:04
and then inside here, these, they uh--
11:10
The way that they're shaped, they go in and then you give them a turn and they lock into place
11:15
so. And the spring goes on the back just to kind of, to hold it there so. It goes in and you turn,
11:21
your spring nuts held, slide 'er back, it's a threaded nut. Get your bolts started.
11:34
And then yeah, the area that -- it stops the spring from turning,
11:38
and so no need for a wrench or anything on the other side.
11:45
This customer also requires passive ventilation, so we'll be installing a couple Big Air 45 vents
11:51
with the bug screen on them. Once the guys are done sawing them,
11:55
we'll give you another closer look at how how they go in and what they look like installed.
12:03
The best part of a spray foam job is the prep work ahead of time.
12:07
The reason we love our contractors, they do such a great job preparing the container
12:12
for spray foam, minimize overspray. Yeah, the more work you can do ahead of time to make sure
12:18
the foam goes only where it needs to go, the better the finished product you're going to
12:22
be left with. We'll just walk you around quick, uh things to point out to your spray foamer.
12:26
Around your windows, we'll be able to spray foam right up to the vinyl edge of the window,
12:31
give a really nice vapor barrier. There won't be any steel condensating throughout the winter.
12:38
You know, down at the floor where the CSM brackets are, that'll all kind of get covered.
12:43
I'll be doing, you know, two inches of foam all the way around. The two inches that come from
12:48
the inside corrugation will be pretty much flush with the outside of the strut channel.
12:54
Same thing around the doors, just foam up to the door. They'll fill the header,
13:01
the header will get filled right in with foam. With your container door flashing kit,
13:07
you'll be able to fill the cavity with foam. The flashing itself will retain it.
13:17
It's just a nice little gap where the rubber door seal is.
13:22
The doors functions just like stock using this kit here. Other other ways of doing it, sometimes
13:30
people only fill this center cavity of the door, and they they don't spray foam the hollow tube
13:37
just to make sure that they don't overspray on the rubber door seal.
13:42
But then this tube throughout the winter has no insulation
13:45
value other than the air that's inside of it, and yeah. It just condensates, frosts up.
13:49
Sometimes your doors, if it's, you know, humid inside, whatever, you can freeze right up so.
13:54
These flashing kits, we love. They work great, they retain all the foam inside,
13:58
and they are set up so that you can still install a sheet of plywood or something and finish the
14:05
interior look of these doors afterwards, and it's very sleek look once it's all done.
14:09
If you've never seen the underside of a shipping container, we'll give you a little peek here.
14:13
So containers have a channel running the full -- this is the 20 foot length of the container. Then,
14:20
underneath about every 13 inches, there's a horizontal or crosswise channel
14:27
that runs the width of it. Then the underside is coated for insects and weather.
14:34
In this case, we'll be spray foaming direct to that coating, there's no issue there.
14:38
The adhesion, it works great. And again, the forklift pockets on on both sides,
14:45
just be careful uh make sure you talk to your spray foamer,
14:48
let them know whether you do or do not want those insulated.
14:52
We're here now with our spray foamers, and they're just taping off all the strut
14:56
and around the windows. So on the vents here, you see they taped off the front bug screen face.
15:04
I can show you maybe later kind of how it all finishes up. The bug screen's still removable.
15:11
The windows behind us, we just take the front face of the window and allow the
15:18
foam to come flush up to the edge of the vinyl, that makes a nice seal and vapor barrier.
15:26
The stock container vent, this foam doesn't uh fly through them, just give it a quick
15:32
shot of tape and that'll be hidden and stay there forever. Here's one that's not done. I'll show ya.
15:42
We'll get at that one shortly.
15:46
There they are hard at work.
15:56
The spray foamers have finished up the job and cleaned everything up. You can see how
16:02
nicely the foam comes up against the unistrut and allows you this beautiful modular interior
16:10
afterwards so. We can now, with spring nuts and bolts, hold anything to the wall still rather
16:17
than have just a pure foamed interior so. Fold down work tables, shelving brackets, pipe racks.
16:25
One thing you can see here in the fork pockets, they've taped them off nicely and spray foamed
16:31
and filled up the fork pocket. We are going to develop a galvanized patch that actually
16:37
installs right over here and cleans that off nicely so you don't have to stare at the foam.
16:41
That's in the works right now and should be available shortly.
16:44
As you can see with our container door flashing kit, the flange has retained the foam very nicely,
16:54
and it's a nice clean steel edge all along the container doors.
17:00
So these doors are going to function just like normal. I'll actually jump outside
17:05
and open up the doors to show you guys how nicely they work.
17:09
A lot of times, if you didn't use this, uh the foam -- like you got to get in there with an
17:16
Exacto Knife or something, and try to really chip away at it. And it always seems like
17:21
cam locks are are heading into your keepers. you're really like you can hear foam compressing
17:27
when you try to close the door. So this just yeah makes it so easy, so nice and tidy, and uh yeah
17:33
once we've done this once we we can never go back to the old way of spray foaming container doors.
17:37
So we're kind of at an awkward height here,
17:39
but I'll show you how easy it is to open these doors again.
17:44
So yeah, anyone's had a spray foam container door before, you'll know it's usually not that simple.
17:57
A lot of times it gets harder it's still so easy.
18:02
Normally, container doors are -- actually the handles are typically lower, so this is
18:07
similar height to what a trailer or container chassis would be, and therefore a lot of the
18:13
door handles are lower so it's easy for the truck operator to open and close the doors.
18:18
These one-time-use containers, they're built in China, used once, and the purpose
18:23
of them is storage in North America, so. We purposely put -- we call them waist height
18:28
handles -- uh it makes it yeah easier you got more leverage when you go to open the doors.
18:34
Uh, once they're on the ground where they're gonna permanently lie, so it makes it kind of awkward
18:39
now that I have the container up for spray foam underneath open, but still very simple to open.
18:46
So we'll give you a final tour of the fit and finish of the spray foam around the vents,
18:52
windows, and the man door.
18:54
So here, this vent frame, for some reason, if someone needed to
19:00
clean it out or change the bug screen or something, you can still remove
19:04
the bug screen, pull it away, do what you got to do and reinsert it.
19:10
And here's the window. So the foam came right up nice and tight up against
19:14
the vinyl window. It completely filled in the window frame,
19:21
the window frame being processed sheet metal, there's no hollow section to the window frame
19:27
so there won't be any condensation coming into the inside of this container and essentially
19:33
this whole container is like a giant cooler. It's going to be very simple to heat or cool.
19:39
And here's the man door. So the foam came up nice and tight against the frame. Again, it's a
19:46
folded sheet metal frame, no hollow sections, so no areas of extreme condensation.
20:01
In this container, we're going to be securing all of our electrical to the strut.
20:05
So uh yeah. In the next day or two here, our electrician will be showing up. Uh, be putting
20:11
lights, plugs, and uh switch in the container, and we'll give you guys an idea on how that all works.
20:18
So here we have our power in plug. These are a really nice plug. It's a waterproof when you're
20:24
not using it, and allows you to fire this entire container using an extension cord.
20:29
The power comes in from the outside
20:32
into a box. Uh, this container is fired with just a single circuit of electrical, so an extension
20:37
cord on the exterior will provide power to all the plugs, the switch, and eventually the lighting.
20:43
So, here we have uh power in to the first receptacle and piped up
20:49
to our switch, and then conduit over to the LED lighting and the plugs.
20:58
So there you have it, that concludes this project. If you like this video please give it a like. If
21:03
you'd like to see more videos, please subscribe to our channel and hit the bell notification.
21:08
If you have any comments or questions, please feel free to leave them below.
21:11
And also check us out at tcg.ca. Hope you learned something.
Step by Step 20’ Shipping Container Modification | Windows, Vents, Man Door, Insulation, Electrical