
Modifying a Shipping Container into a Sea Can Garage or Workshop - Roll Shutter Door Installation
Installing a garage door on a sea container is made easy as Channing McCorriston, The Container Guy, explains the process.
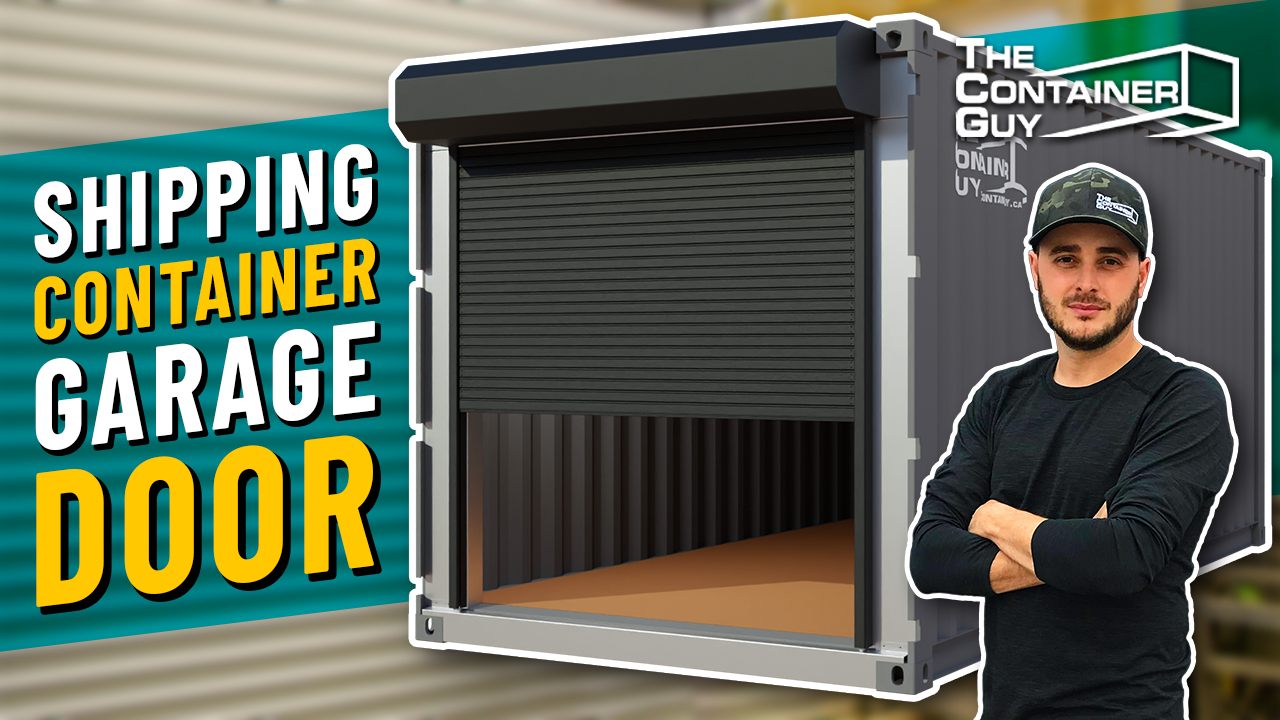
This video focuses on installing a roller shutter in place of the double swing doors, but as long as you have a framing kit that the roll shutter sits against, you can install it anywhere on a steel box.
A roll shutter door is great if you’re wanting to replace the swing-out doors of the container for easy access but you don’t want to lose any interior room of the structure.
You can use this container building as a workshop, storage unit, or anything you need it to be. Roll Up Shutter Doors are also great for modifying your sea can into a garage.
Although a 20’ shipping container won’t be able to store regular sized cars, you can convert it into a garage for motorcycles, quads, or ski-doos/sea-doos.
Purchase Container Modification World Products Featured in The Video
Installing an Aluminum Insulated Roll Shutter Door on a Shipping Container
In this walkthrough, Channing McCorriston, The Container Guy, explains the step-by-step process of installing an aluminum insulated roll shutter door in the door end of a shipping container.
This installation focuses on restoring structural integrity, ensuring smooth operation, and protecting against water intrusion while creating a secure access point.
Why a Framing Kit Is Required
A roll shutter door cannot be installed directly onto container corrugations.
Once the original container doors are removed, structural reinforcement is necessary. A proper framing kit restores rigidity and provides a flat mounting surface for the door system.
The framing kit consists of:
-
Two extruded aluminum side frames
-
One header with an integrated rain drip
The header extends the container doorway footer and attaches securely to the corner posts using self-tapping screws. The built-in rain drip directs water away from the opening to prevent water ingress.
Without this framing system, the container structure would be compromised and the door would not operate correctly.
Understanding the Door Components
The side frames are approximately three inches wide and made from extruded aluminum. Each frame includes a rubber seal and pre-drilled holes designed for proper screw placement.
A larger front hole allows the screw head to sit flush, while a smaller rear hole accepts the self-tapping screw into the hollow corner post.
The header is approximately ten inches tall. It must sit flush against the framing kit without rivets, welds, or obstructions within the first ten inches, ensuring the roll shutter mechanism seats properly.
The door arrives fully pre-tensioned from the factory. If adjustment is needed, tension can be modified by carefully rotating the coil inside the header.
Preparing the Container
Before installation begins:
-
Remove the original container doors
-
Remove any existing fittings or obstructions
-
Ensure mounting surfaces are smooth and at least three inches wide
-
Confirm alignment between side frames and header
Proper preparation prevents interference during installation and ensures structural stability.
Installing the Framing Kit
The side frames are secured into the hollow corner posts using self-tapping screws.
Screw placement is important. Screws must be positioned high on the header to avoid interfering with the rolling action of the shutter.
The framing kit creates the tracks that guide the door as it rolls up and down.
Lifting and Positioning the Door
Because of its size and weight, at least two people should lift and align the roll shutter door.
The pre-tensioned door is slid into the side tracks and clamped temporarily at the top corners. Before fully securing it, the door should be pulled down and tested to confirm smooth operation.
Testing before final fastening ensures the system is aligned properly.
Securing and Finishing
Once alignment is confirmed:
-
Fully fasten the side frames
-
Remove the top cover
-
Drill and install quarter-inch thread-cutting screws
-
Replace the top cover
-
Install decorative caps to conceal screw heads
The finished system includes a slide latch locking mechanism, and three sets of keys are provided.
The result is a clean, secure, and weather-resistant installation.
Why Roll Shutter Doors Work Well on Containers
Aluminum insulated roll shutter doors are commonly used in commercial storefronts due to their durability and security.
When paired with a proper framing kit, they offer:
-
Strong security
-
Smooth rolling operation
-
Weather resistance
-
Minimal exterior paint damage during installation
They are ideal for containers converted into secure storage units, workshops, kiosks, or retail spaces.
Best Practices to Remember
-
Never mount directly to corrugations
-
Ensure smooth, unobstructed mounting surfaces
-
Position screws carefully to avoid interfering with the shutter roll
-
Handle pre-tensioned springs with caution
-
Test operation before final fastening
-
Use decorative caps for a clean finish
Final Thoughts
Installing an aluminum insulated roll shutter door on a shipping container requires structural reinforcement, precise alignment, and proper fastening techniques.
By using a purpose-built framing kit and following careful installation steps, the result is a secure, weather-protected, and professionally finished door system that enhances both access and security.